The TR3 uses a steering system based on a worm (spiral gear) at the end of the steering column that connects to an actuating arm via a peg that rides inside the spirals on the worm. Turning the steering wheel, spins the spiral gear, which moves the peg, which rotates the rocker shaft and the drop arm it is connected to, which pushes and pulls on the tie-rod steering assembly. You get the picture… knee bone, connects to the shin bone, connects to the… Below is the original steering box with the drop arm pointing at 12 o’clock. rotating the steering wheel pivots this arm from about 10 o’clock to 2 o’clock. You can tell is has not been restored because the steering box left the factory in 1959 painted black with yellow swatches on it.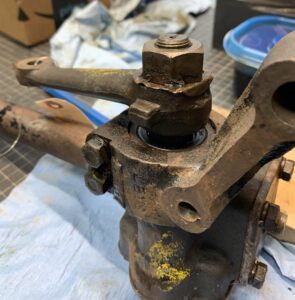
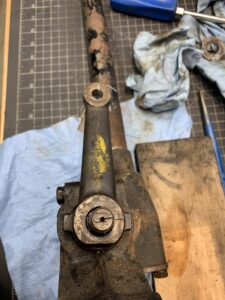
Having tight tolerances between the peg and the worm with little to no lateral movement of the peg arm in its bushing is key to minimizing or best yet, removing, the tendency to wander on the road. Later cars, starting with the TR4 used a rack and pinion system that was more driver friendly.
Restoring this steering box required an assessment of the top and bottom bearings the worm rides on, along with the condition of the peg, the arm it connects to, and its bushing. Upon disassembly the steering box had clearly been fluid free for a long time, and the lowest bearing was encased in rust. Not good, time to order new bearings and races, and a new peg.
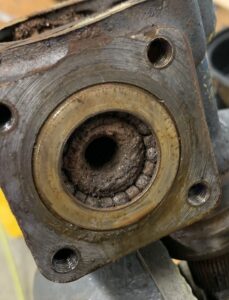
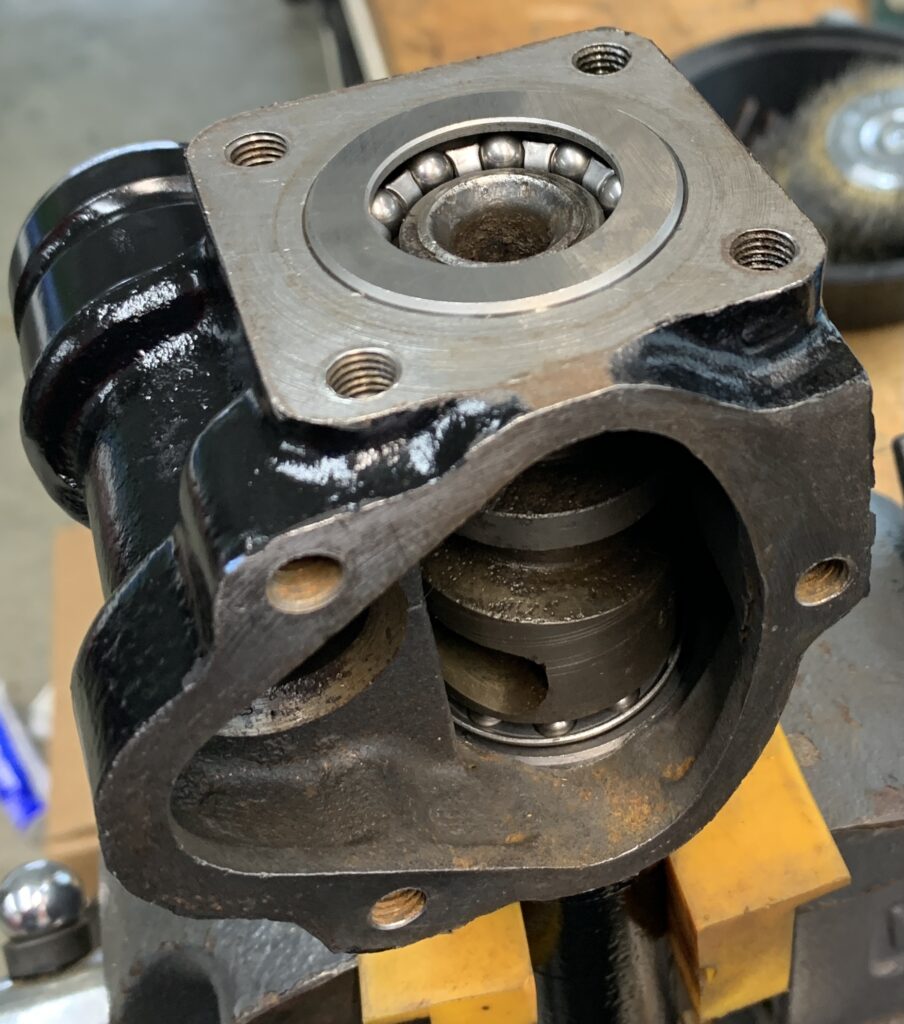
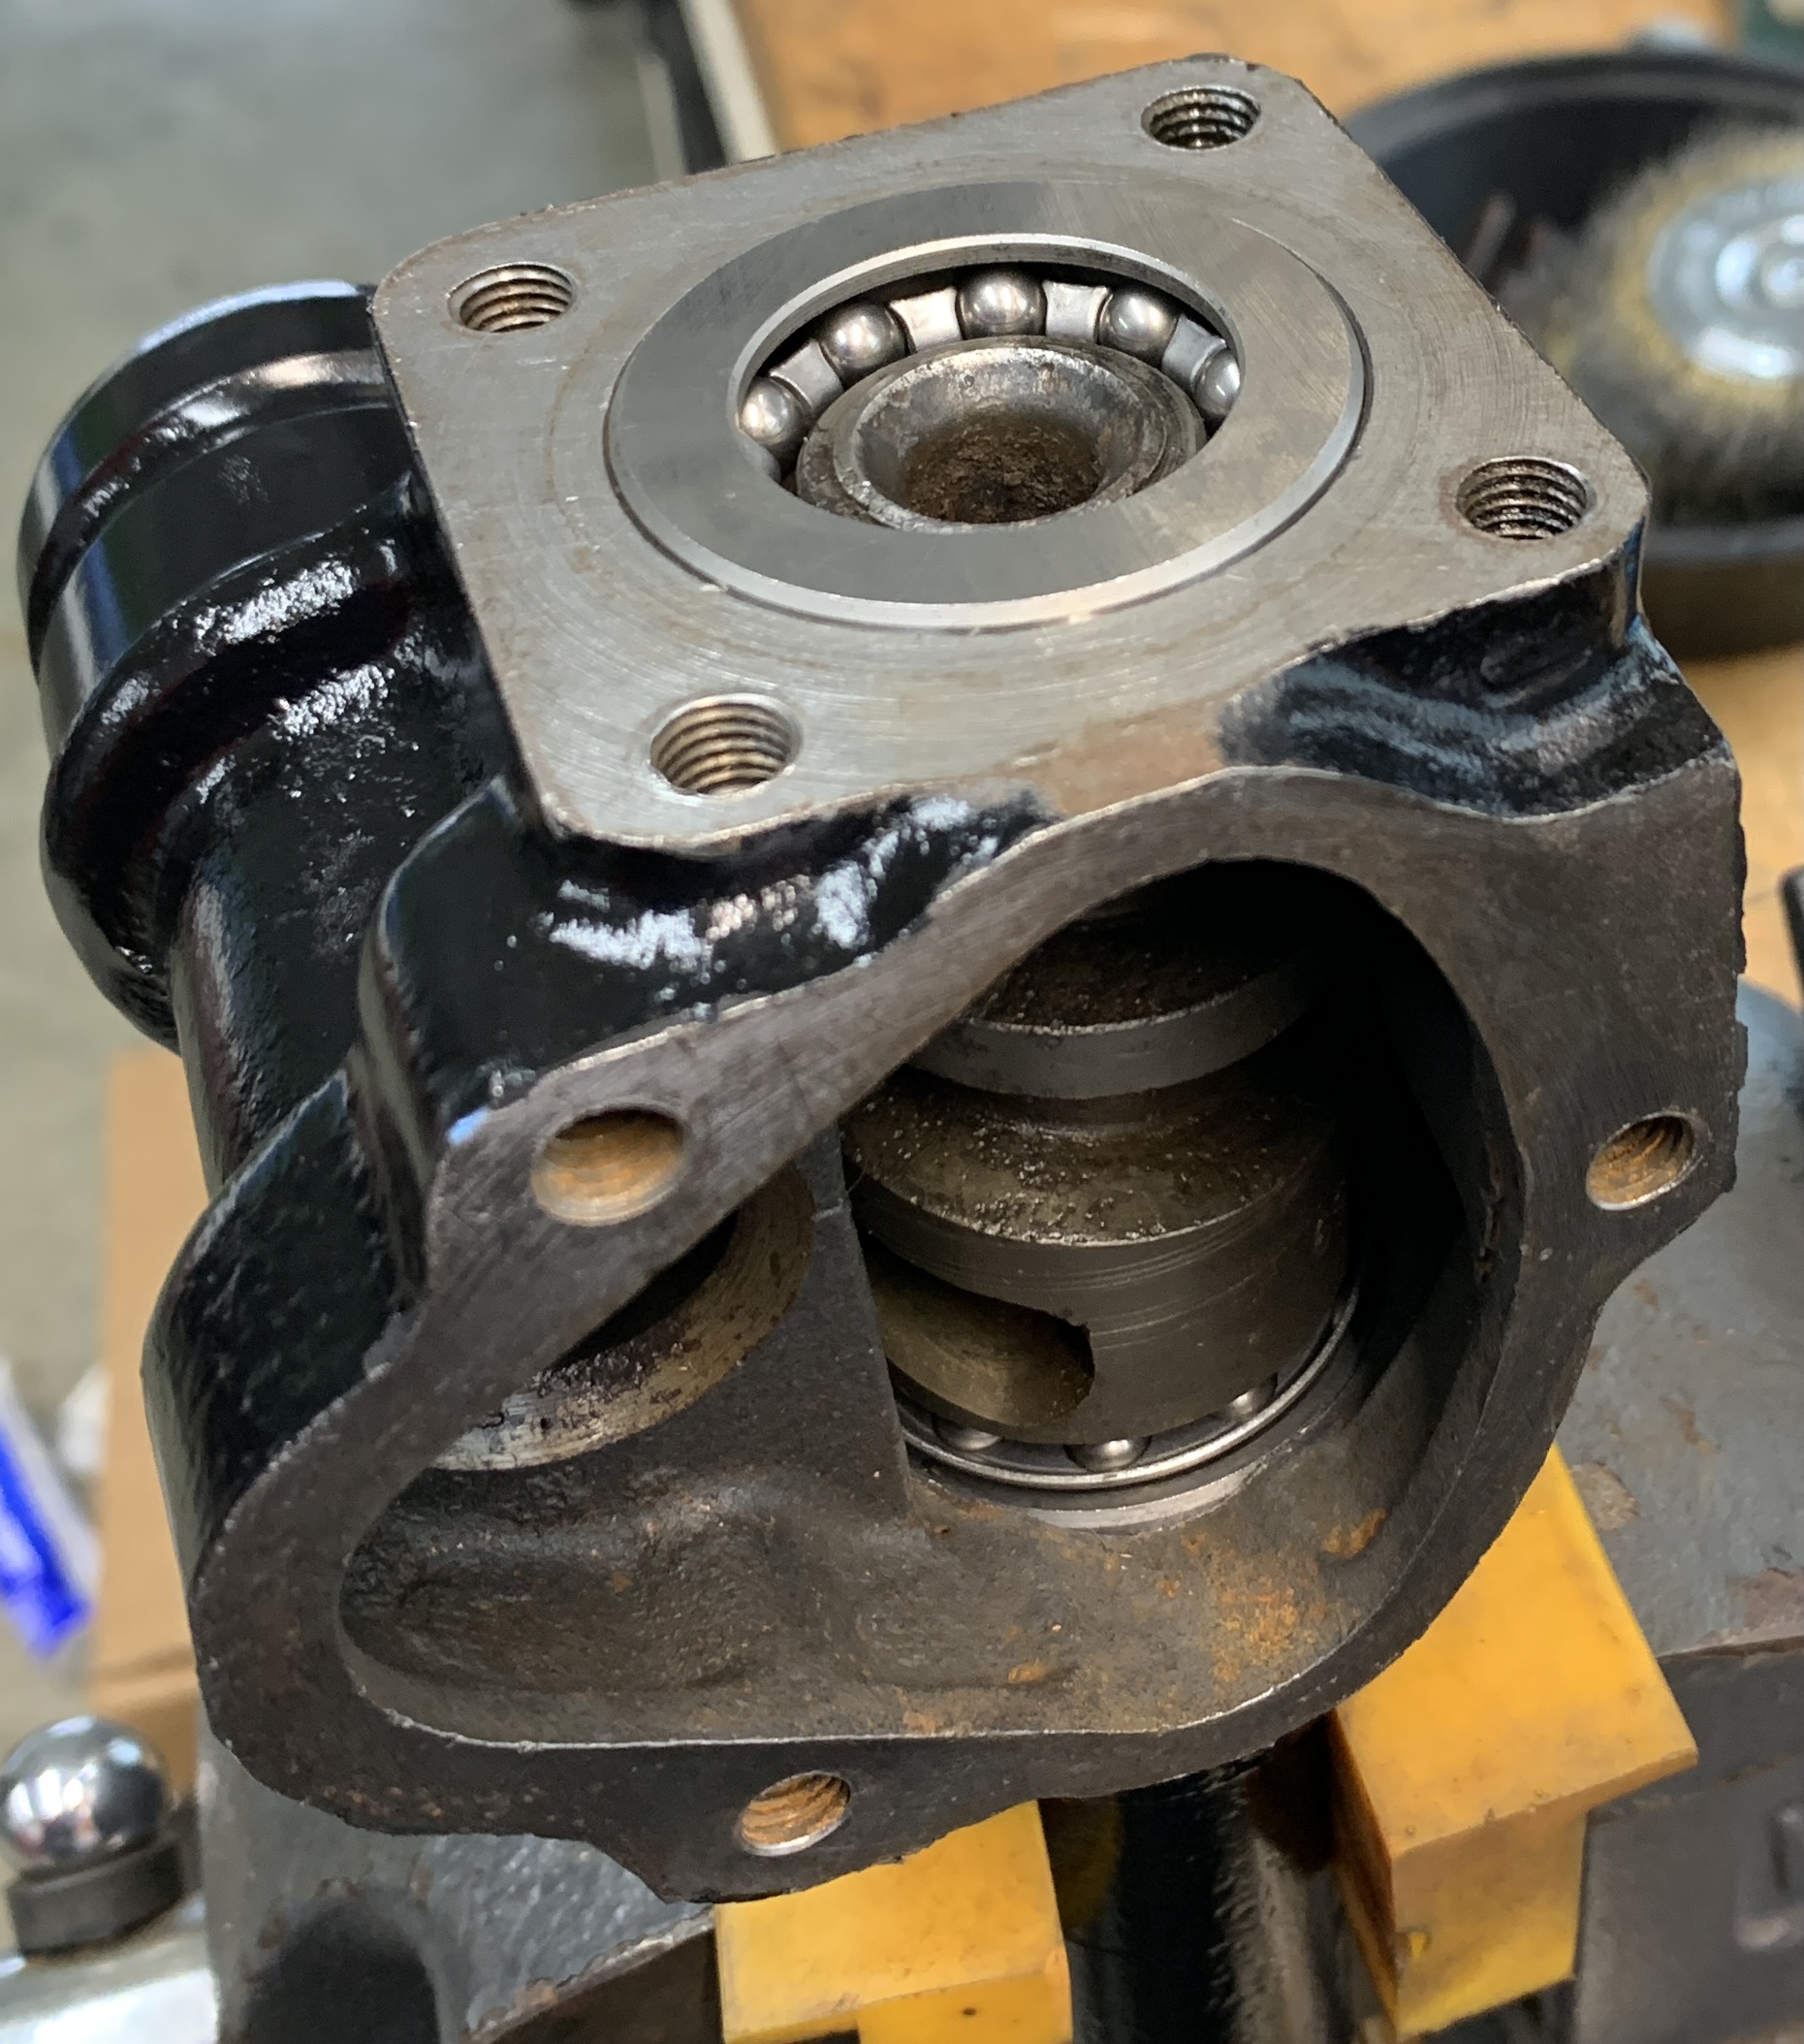
Here is the inside of the box showing the worm and the arm containing the peg, which sits just under that lower divot. The upper bearing is just to the left of the worm and the lower bearing is not visible and to the right. The above photo shows the end of the worm riding on its bearing.
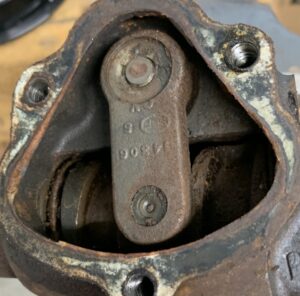 All components, including shims that set the worm float (needs to be zero) are shown below. The bits were cleaned, inspected, and the external components painted. The peg is visible at the lower left. In the end I found a replacement worm that was not corroded at the end where the bearing rides and in the groove. This made for a smoother rotation of the column and hopefully lighter steering down the road. The manufacture dates on the worm and the lower plate were 1959.
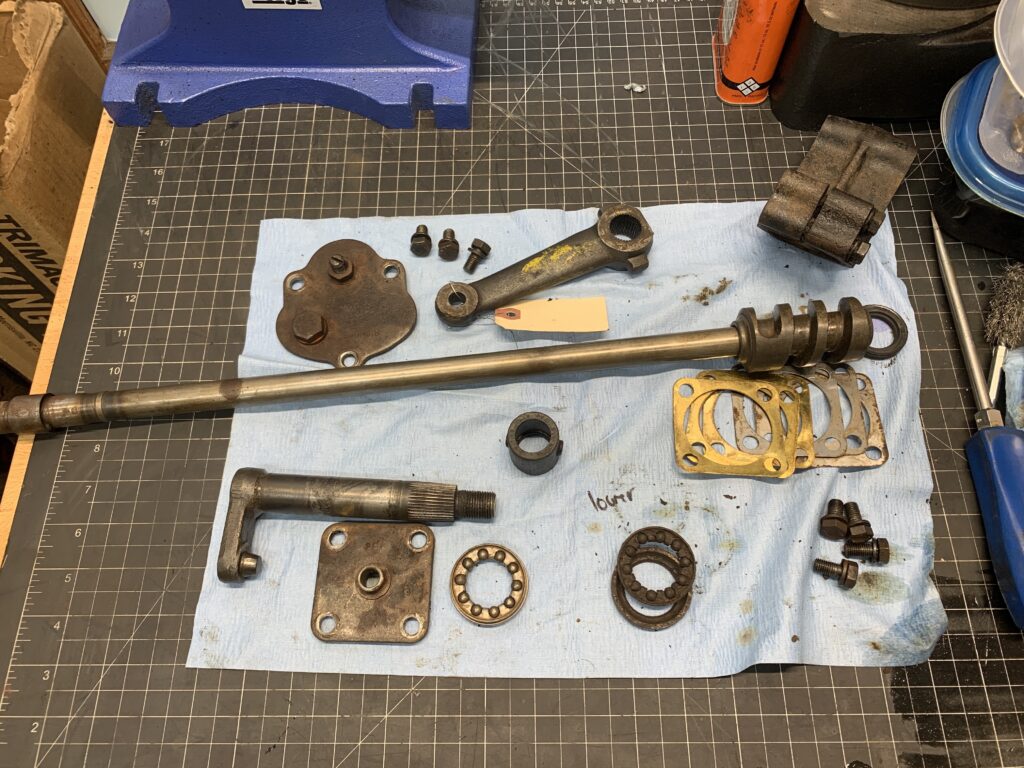
As they say, reassembly was the reverse of the above. Below was the old worm with a new bearing and race, and hints at the pitting of the worm, visible both in the spiral itself and the top where the bearing rides. The new one was significantly better on both counts. The shims sit on this flange and are used to adjust the float on the worm. The goal is zero float with a little pre-load on the bearings OK. Don’t want loose steering!
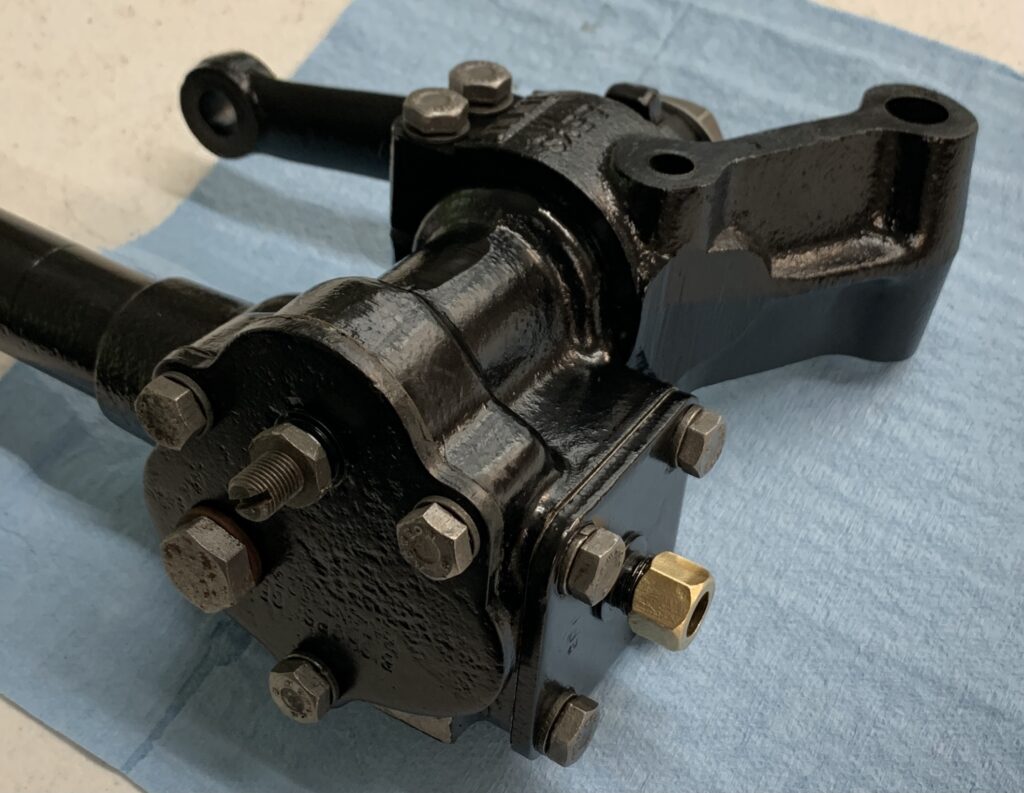
Here it is all sorted. The final adjustment of the position of the peg (new one pressed in) on the worm is via the slotted bolt with a lock nut. This bolt pushes down on the rocker shaft and is adjusted so there is a slight drag at the middle of the travel. It is quite sensitive so it is easy to bind the movement completely or make it so loose that the slight drag is not felt. The polished nut on the right is a gland nut that seals in an inner tube (stator) that travels through the box up the shaft and exits at the steering wheel. This is the routing for the horn and turn signal wiring. Without a tube to seal off this hole, the box won’t hold oil, so I put some gear oil in, rotated it about and then dumped it out so that it could be stored with gear oil on the gears.
 On to the next thing…
4 Comments
Could I have an explanation on how to remove/replace the steering worm gear.
Hi Gary,
Hmmmm, not sure what stage you are at… The gear comes out the very bottom where the most visible bearing is seen. Pop that race out of there and the worm can come out once the peg is disengaged. That requires removing the plate that faces the camera in the top picture. Is this helpful? Feel free to reach out to my email address if I’m not being clear.
Mike
My name is Dick, I got your email from my friend, Ken Hyman, who works for Moss. My problem: I removed the upper and lower covers to add a heaver grease and new gaskets. I re-installed the shims, bearing and new gasket to the lower plate. I added new grease to the upper section of the box; here’s where I made the mistake. I moved the wheel slowly thinking it would better circulate the new grease, with the cover off. The steering immediately locked up. Apparently the peg is out of the groove and on top of the ridge. I have tried to move the rocker shaft up to solve the problem, no luck. Do you think that if I removed the lower cover, shims and bearing, the cam would drop down enough to release the peg?
Hi Dick,
Thanks for you message. It has been a couple years now since I did that work.
You might be interested in this video I actually found just this morning. He discusses the steering box, and then ultimately decides to send it to Macy’s garage to do the rebuilding. In his case, the peg, which is supposed to be a press fit, was loose enough that he could push it out with his fingers.
https://www.youtube.com/watch?v=d_xECIqEKPU
In my own particular case, I put it back together but left it is only lightly oiled so as not to make a mess (still doing extensive bodywork). My recollection is the steering box takes a heavy oil and not grease but I don’t recall what weight that is at the moment. Looking back over the blog photos helped jog my memory. Is it possible to get some freedom back in the peg by releasing the lock nut built into the side plate? If I recall, that is a very sensitive adjuster for getting just the right drag on the peg as it moves in the worm gear. Perhaps it is jammed… it is the slotted adjustor facing lower left in this photo.
In your case, you say the top cover, shim stack is on, but the side plate is off (making above question about the adjustor moot). When you rotated the wheel with the arm and peg engaged it got caught up. Can you pull the arm back out or is the stuck peg holding it in there? Thinking more on your question… if you do remove the top bearing, you aught to get a little side-to-side displacement in the worm gear. Hopefully that is enough to free the peg if indeed it has lodged itself.
I hope this is helpful. I haven’t done much to keep up this blog since my dad prefers his updates in video format, but I do find it helpful for reference purposes.
Let me know if I’ve been helpful, or can help any other ways…
Cheers, Mike