
Here’s a quick guide that we put together for logins and making posts.
Login to SILS DSA backend
First thing is to log into Tarheels.Live, which is just a custom version of WordPress.
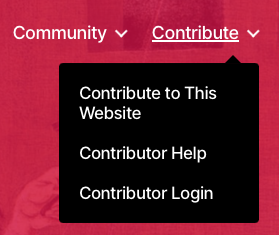
Click on “Contributor Login” from the main website menu, or use the login button in website footer. You will see the familiar Onyen login page.
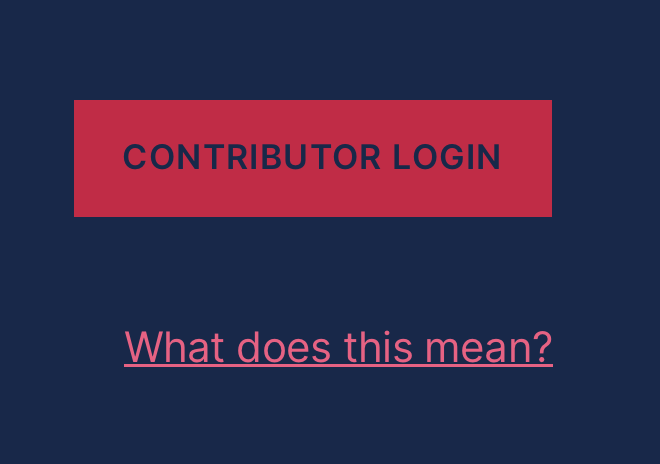
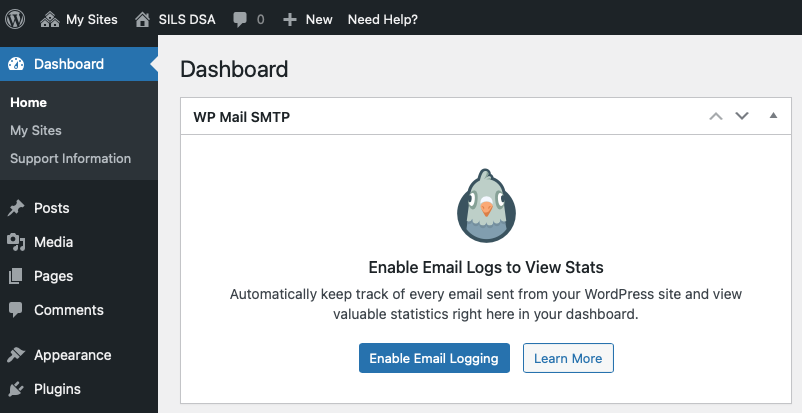
Log in with your Onyen. And you should be directed to the SILS DSA website backend.
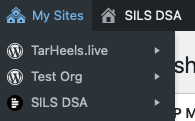
Notice that you will have multiple sites connected to your account. This is just how WordPress works: one account can access many sites, and one site can have many contributors. Clicking on the three-house “My Sites” button will show you all the sites you’re on. To the right, the one-house button will tell you which site you’re now working on.
We have manually added every current doctoral student as an editor to this site, and we tried to be as current as possible. If you are logged in but still cannot access the SILS DSA backend, maybe you’re not granted editor permission yet. Please contact us so we can add you to the list!
Changing between website backend and frontend
If you’re familiar with WordPress’ backend interface and comfortable navigating it, you can do all the editing here.
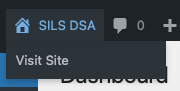
Or you can click on “SILS DSA” -> “Visit Site” in the top bar to go back to the website frontend. This frontend is a bit less overwhelming, but it only gives you partial functionality when managing website contents.
When you’re on the frontend, you can always go back to the backend by clicking on “SILS DSA” -> “Dashboard.”

Add your profile
If you haven’t done this already, please add your own profile to the website! Here are the steps:
Step 1: Log in
Make sure you’re logged in.
Step 2: Create New Post
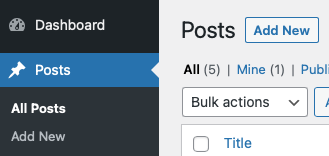
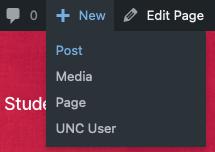
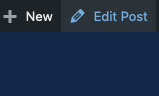
From the SILS DSA backend, click on “Posts” -> “Add New.” Or, if you’re on the website frontend, use “+ New” -> “Post” from the top tool bar.
Note that if you have drafted unpublished posts, you can also find those through the SILS DSA backend, in the list of posts. Drafts won’t be accessible through the frontend.
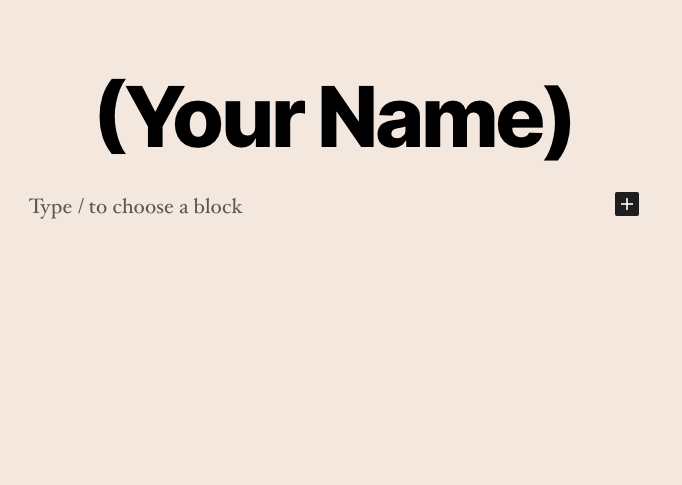
Step 3: Basic Setup
Now you should be in the post editor. First let’s put in basic information to make sure your profile is well formatted. There are 4 things you need to check:
- Put your full name into the post title.
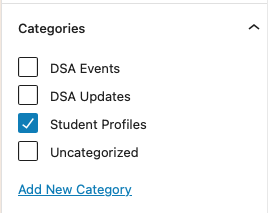
- Then, in the settings panel (on the right if you’re on desktop), set “Categories” to “Student Profiles.”
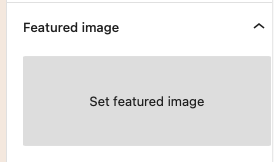
- Set featured image with your profile picture (it doesn’t have to be your selfie!).
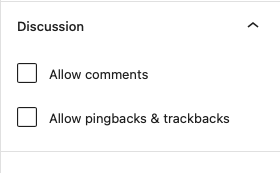
- And finally, remember to turn off comments and pingbacks/trackbacks.
Step 4: Write & Publish.
Now that your profile is correctly formatted, the rest of it is up to you! Feel free to introduce yourself in the way you like, share your interests and fun facts, or say something about your work. You can also refer to existing posts for inspirations.
Once you’re happy with your post, click on “Publish” and it will go live!
Step 5: Check & Re-Edit
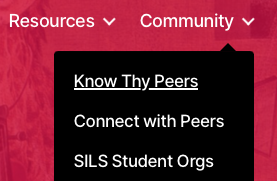
You can find your published post in “Community” -> “Know Thy Peers.” If anything doesn’t look quite right to you, or if you want to update the profile, simply click into your profile post, and click on “Edit Post” in the top bar.
If you cannot find your post on the list, either its category is not set correctly, or you may have only saved it as a draft. In either case, please go to SILS DSA backend and check your post settings.
・
This website is run by students, for students. To join us as a fellow site contributor or make editing suggestions, please contact our current website editors.
・