The Solar System! We know it, we love it, we live in it! Most of us are well aware of what the eight planets of our neighborhood that revolves the sun look like. In this experiment, we take a look at observing (those that are observable) these very planets with an emphasis on colors. The diversity in size, color, and detail is what makes each of them unique. Studying these aspects has been a blast!
1 – Observations
Working together with a group to observe the planets, we split up the tasks. I chose Uranus, Delanie Mitchell was tasked with Mars, and Mia Mese with Neptune. Our group unfortunately did not receive any images back for Jupiter, since the observation window was getting smaller quickly, as the gas giant got closer to being washed out by the sun each day. Therefore, we used our instructor’s (Dan Reichart) images of Jupiter that he was able to get in time. The other planets weren’t observable unfortunately, as they were also too close to the sun.
Telescopes, Filters, Exposures ~
All the planets used the same maximum sun elevation (-12), minimum target elevation (30), and maximum moon phase (100). The minimum moon separation being raised to 30 was more helpful for the fainter planets.
Uranus and Neptune are faint enough to image using the regular R (red), V (green), and B (blue) filters. Mars and Jupiter are brighter, so they require the narrowband filter counterparts for RGB, H𝛼, OIII, and U, respectfully.
All of our images were taken using PROMPT-5 at CTIO, which again is the site with the least atmospheric blurring that we have access to through Skynet.
– For Mars, we took 10 exposures with 1.2 seconds for the U band, 0.3 for H𝛼, and 0.6 for OIII.
– I took 30 exposures for Uranus, with 2.5 seconds for the B, and 1 second for V and R.
– For Neptune, we took 10 exposures with 15 seconds for B, and 7.5 seconds for V and R.
– For the Jupiter observation, we submitted 10 exposures with 1.5 seconds for U, with 1 second for H𝛼 and OIII. I’m assuming DR used the same exposure settings for the images we used!
2 – Image Processing
For each planet, I had to align and stack the images (one planet at a time). To see each planet easily in Afterglow, I used the “Bright Target” display setting. Aligning them wasn’t too bad, I just had to use the Source Catalog tab to mark the center of each image of any given planet and then align them about that point. Once this was done for a planet, stacking them was simple. I stacked the images based on their filters, grouped and colored them, then moved on to color balancing (to get accurate colors in our images). This is where things got tricky.
First, I used percentile color balancing for Jupiter. Percentile color balance mode assumes that the brightest point in the image is white. For images that have white in them, like Jupiter, this works great! All I had to do was use this mode, up the saturation level to near 100%, and export the image. I only adjusted the clarity a little in post-processing (using the Windows photo viewer/editor). This first image was to focus on as much detail of the planet itself as possible. Immediately after, I adjusted the saturation & background levels a little to reveal the glorious moons of Jupiter and reduce noise.
Tackling Neptune and Uranus was a whole other beast (at least at first)! Since the brightest part of these planets are not white, percentile mode would lead to inaccurate “artificial” white planets, which isn’t what we’re looking for. To get natural colors, we used Photometrically Calibrated Color Balancing with the help of the World Coordinate System (WCS). Since Neptune and Uranus are far and faint enough, we capture enough background stars in our stacked image to compare to catalog values and attach a WCS to it. Once this was done, I photometered/measured the brightness of the background stars and compared them to catalog values to determine how much to change the brightness of two of my colored stacks relative to one (of the three total). I changed the color balance mode to be Histogram Fitting, and using the Photometric Color Calibration tool & syncing the brightness and contrast of all the layers about one of them (blue in this case), I ended up with accurate, natural colors!
For Mars, we weren’t able to use background stars in our image (there weren’t enough or any visible at all). I adjusted the color of my Mars image using the Histogram Fitting color balance mode, and adjusting the scale of the colors of two of the layers relative to the third (as a reference layer). By doing this by eye until the stacked image appeared to be the color of the red planet, I ended up with an accurately colored image of Mars!
3 – Interpretation / Analysis
The different colors of the solar system are quite spectacular. Being able to achieve even this much from within Earth’s atmosphere is an impressive feat.

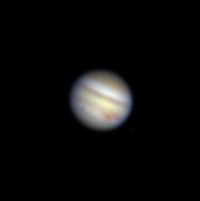
I took this photo of Jupiter remotely using a robotic telescope in Chile (PROMPT-6 @ CTIO)! Although not as clear as space telescopes, we can still see a good amount of detail since the planet is SO massive. The different colored bands represent different temperatures & depths of ammonia ice, ammonium-hydrosulfide ice, and water ice, all put under the immense pressure of Jupiter’s ridiculously strong surface gravity! And of course, we can see the famous “red spot,” a gigantic storm the size of two or three Earths!
First off, Jupiter has bands of color (beige/white, red, brown) along with its famous red spot. The planet’s quick rotation speed (rotation every 10 hours), along with its incredibly strong surface gravity due to its sheer mass, make the clouds thin which allows us to see lower layers of the planet through the upper layers.
At this temperature, ammonia ice has a butterscotch color. Ammonium-hydrosulfide ice gives the planet its various shades of brown, which also depends on the temperature (dependent on depth). And of course, water ice gives it the white colors.
The red spot (large as two or three Earths!) is a gigantic storm made up of the various gasses the planet holds.

Jupiter’s moons have some interesting colors! Io has a yellow hue because of its sulfuric & volcanic surface. Out of the ice-covered moons, Europa is whiter (newer ice), while Ganymede and Callisto are darker (older ice). Titan actually has an atmosphere of its own! The hazy hydrocarbon layers give it an orange hue.


Uranus and Neptune are noticeably blue!
These planets are so far away from the sun (therefore cold enough) to contain methane ice clouds, which reflect blue light / absorb red light. This, alongside scattering of shorter-wavelength (bluer) light colors these planets their blue tints. This scattering of bluer light is also why our Earth’s sky is blue! Uranus’s haze layer is likely a bit thicker than Neptune’s, hence the slight differing shade.


Neptune’s reddish-brown moon, Triton (Neptune’s largest moon), is actually quite bright. Much of its surface is covered in frozen nitrogen, which reflects sunlight quite well.
In my image, four of Uranus’s moons are visible. From left to right, they are Titania, Ariel, Umbriel, and Oberon. Although faint, they’re still really cool to see!


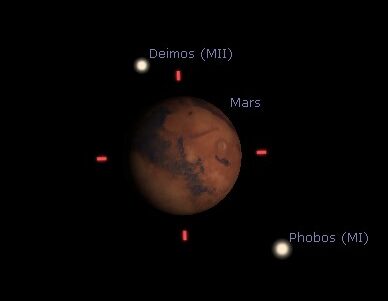
As we can see, Mars was unfortunately too far away for my group’s observation to be anything more than a smudge through the atmosphere. The color, although not perfect (manually balanced), is pretty close to being accurate! The “red planet” gets its brownish-red color from iron oxides (rust) in the soil. With a more detailed image at the right time, you may see white polar ice caps (carbon-dioxide ice & some water ice).
What a diverse system of planets! I couldn’t be more amazed by our solar family! <3
Very nice! Featured on https://www.danreichart.com/mbob